Go Open Source...

Go Open Source...

Latest Updates

Wednesday, May 20, 2015

[Solved] Log In Without Password in Windows

Posted By: Saurabh Deochake - 10:44:00 AM


Here is a cool trick which enables you to log into the computer without using password. Please follow the steps given below.
1) Start your computer. 
2) When you see the start screen, immediately power off the CPU.

3)Start your computer. This time you will see a window as shown below.


4) Select "Launch Startup Repair (recommended)".

5) Wait for few minutes. 

6) You should see following window of Startup Repair.


Wait for few more minutes.


7) If you see "System Restore" option, select 'cancel'.

8) When you see following screen, press downward arrow reading "View problem details".


9) Scroll down to the last bottom page. You will see a link below the line

   "If the online privacy statement is not available, please read our privacy statem...".
               
    Open that Notepad file link.


10) You will see a notepad file. Go to File->Open. 
      Navigate to C:\Windows\System32.

11) Change "Files of type" from "Text document" to "All files".

12) Search for "sethc".

13) Rename it from "sethc" to "sethc-1".

14) Search for "cmd" and create a copy by copying and pasting.

15) Rename it from "cmd-copy" to "sethc".

16) close the open window and notepad.

17) Select "Don't send" -> "Finish".

18) Restart your computer and you will see this window.


19)Press shift 5 times and a command prompt window will appear.

20) Type "net user" 


21) Figure out your user account name. I am assuming it to be "name".
      Type "net user name *"

22) Type new password and you'll see this window.


Step 23: Login with the new password.


Did it work? Please let us know in the comments below.

Note:
1) The steps to log into the system without password were taken from Himansh Jain's answer on Quora. 

2) Please don't misuse this technique. This is only for educational purposes.
3) This technique probably doesn't work in windows 8.
4) You may want to read blog's terms of use before you attempt above steps.             

Saturday, March 28, 2015

[Solved] Python Pynotify- gio.Error: The connection is closed

Posted By: Saurabh Deochake - 8:47:00 PM


Pynotify:

Pynotify is a Python package providing tools for implementing Observer programming pattern. These tools include signals, conditions and variables. Pynotify comes handy when one wants to write a script which outputs some "notification" pop-up on the desktop. Pynotify relies on Dbus IPC bus and problem occurred in Dbus may cause Pynotify to break. There is a well-known problem that usually occurs while using Pynotify. We discuss the problem below and solution to overcome the problem.


Problem:  

Whenever we use show() method of pynotify to show the message in pop-up window, it gives you error in the following format: 
Traceback (most recent call last):
  File "NotifyMe.py", line 14, in <module>
    notifications.show()
gio.Error: Connection Closed
The gio.Error is related to Dbus suggesting that the connection to Dbus is closed. 

Cause:

I was working on one project which uses Pynotify and I encountered the same problem. After a lot of research I found out that I was calling my script with root user. If you are also running your script with root user, then it may be the problem. The problem is that root does not have a dbus session running. I found out that it does not even own XScreen. I assume we want to use Dbus session that belongs to the logged in user.

Solution:


There are two or three workarounds to tackle the problem and get your pynotify script working. We discuss those solutions below:


  1. Quit Root User Session: Most probably current Dbus session belongs to normal user which is currently logged in. So, better and simple way to avoid above problem is to quit root user session using "ctrl+d" and run the script again. 
  2. Use GKsu: GKSu is a library that provides a Gtk+ frontend to su and sudo. GUI applications should be started with gksu, not su or sudo.
  3. Add "root" User to Dbus Group: A simple workaround can be adding the "root" user to Dbus group to give it the permission to connect to Dbus. I have not verified this step. So, if it works for you, please let me know in the comments section.
  4. Exporting Display Variable: Another workaround that MAY help in solving the problem is exporting display variable. Add following lines of code to start of your python script and see if it helps.

import os
os.environ['DISPLAY'] = ':0.0'


I hope above solutions will work for you and you'd be able to work with pynotify in your projects. Any alternate suggestions to solve the problem? Do let us know in comments section below.

Wednesday, February 18, 2015

Use WhatsApp Without Internet Connection

Posted By: Saurabh Deochake - 2:51:00 PM


With 700 million monthly users, WhatsApp is one of the most popular instant messaging services worldwide. Even though WhatsApp is a free app, you still need to pay a great amount for the Internet data and it gets more expensive when you are in roaming in a foreign country. However, now you can cut down on your Internet expenses and access WhatsApp without the Internet using a newly launched sim named WhatSim. An Italian company, Zeromobile has launched WhatSim, a WhatsApp-only SIM that comes with a plan that will let you use the popular messaging app for free while travelling across about 150 countries.

A WhatSim Card

What is WhatSim?

WhatSim is a new SIM card which allows you to send and receive messages only via WhatsApp. The company claims that the WhatSim connects to more than 400 operators in about 150 countries. 

Manuel Zanella Rngineer, CEO of Zeromobile, the company who introduced WhatSim, says, "WhatsApp is the future of mobile communications. Its only "limit" is the data connection especially when you are traveling because the roaming charges are expensive and you can't always find Wi-Fi everywhere and it is not always free. As someone who appreciates and uses WhatsApp, I tried to figure out how to get around this problem. That's why WhatSim is an extraordinary opportunity for WhatsApp."

WhatSim Pricing

The WhatSim card is priced at 10 euros (Approx. $11.5), which allows you to use WhatsApp for a year without spending on Internet data. You can send and receive messages, share locations and contact number via WhatsApp for free with the help of WhatSim. But in order to send and download multimedia files, users will have to recharge WhatSim through their website or (soon) a dedicated app for recharging the WhatSim. For example, on every recharge of 5 euro, WhatSim users will receive 1,000 credits. These credits will be spent on sending the multimedia files to other users. 

Zanella further explains, "The solution we have developed is simple and intuitive. With €5 you get 1000 credits that you can use, for instance, to exchange 50 photos or 10 videos in many countries around the world. There are no limits to sharing your position and contacts. This way we guarantee the utmost transparency. Buying a recharge is quick and easy: just go to our website even from your smartphone and soon even from a dedicated app."

Certainly an innovative idea, WhatSim can be most beneficial for people frequently travelling to other countries and who want to reduce the huge Internet data expense while roaming.

Thursday, January 22, 2015

How To Use WhatsApp On Your Computer Using WhatsApp Web

Posted By: Saurabh Deochake - 5:29:00 PM


WhatsApp Web

Today, the popular instant messaging service WhatsApp launched the web version of its Android and iOS app. The client service is named as WhatsApp Web. As said by the company, the web client is simply an extension of your phone. The web browser mirrors conversations and messages from your mobile device - this means all of your messages still live on your phone. The company also says that unfortunately for now, they will not be able to provide web client to iOS users due to Apple platform limitations.


How to Get WhatsApp Web Working

To get WhatsApp Web working on your computer, follow the below steps:
  1. Currently, WhatsApp Web works only on Google Chrome. If you do not have Google Chrome browser installed on your computer. Download the browser from here and install it on your computer.
  2. Download the latest version of WhatsApp from the Google Play Store
  3. Now, go to your computer and open https://web.whatsapp.com in Google Chrome browser (only works in Google Chrome). You should see a QR code.
  4. Next, go to the WhatsApp app installed on your cellphone and press menu/right click on your phone, you will see WhatsApp web option.
  5. Select WhatsApp Web option and scan the QR code using your rear camera.
  6. That's it. It will automatically sync with WhatsApp servers and display all of your messages.
Screenshot of WhatsApp Web Client on Chrome


We think that it's an innovative way to control all your WhatsApp messages on your phone while working on your computer without touching your phone every now and then and typing on the tiny keypad of your smartphone.

(Also Read: How to use WhatsApp with Internet connection.)

How did you find WhatsApp's new web-based chat client? Do let us know in comments below.


Wednesday, January 21, 2015

WhatsApp Bans WhatsApp Plus and WhatsAppMD Users

Posted By: Saurabh Deochake - 6:21:00 PM


The News!

Popular instant messaging service WhatsApp is said to be temporarily banning users that are using the third-party clients like WhatsApp Plus and WhatsAppMD. WhatsApp Plus, specifically, is developed by a third-party developer known as a nickname of RAFALENSE by including extra features to WhatsApp and publishing the mod as WhatsApp Plus on XDA forum in 2012. WhatsApp Plus is being wrongly circulated as an alternative to the traditional WhatsApp making onlookers falsely believe that it is the next version of WhatsApp.

A Banned WhatsApp Plus Account

Sensing a probable privacy and security threat, WhatsApp is now barring all those users who have WhatsApp Plus installed and running on their smartphones/tablets. User instances reveal that the ban imposed by WhatsApp lasts for 24 hours on charges of violating its 'terms of service' by using a third-party client. Now news are coming that WhatsApp is not only banning WhatsApp Plus users but also WhatsAppMD and other third-party apps based on WhatsApp.

(
Also Read: How to use WhatsApp with Internet connection.)

WhatsApp's Say on Third-party Apps

WhatsApp mentions on its official FAQ webpage, "WhatsApp Plus is an application that was not developed by WhatsApp, nor is it authorised by WhatsApp. The developers of WhatsApp Plus have no relationship to WhatsApp, and we do not support WhatsApp Plus. Please be aware that WhatsApp Plus contains source code which WhatsApp cannot guarantee as safe and that your private information is potentially being passed to 3rd parties without your knowledge or authorization."

On WhatsApp Plus Users Ban

Now What Should I Do?

If you are already banned user then you should wait for the fix from RAFALENSE until he fixes the problem.

If you are lucky and still everything is running well for you, we suggest you to uninstall any third party apps you have installed (WhatsApp Plus, WhatsAppMD etc.) and download WhatsApp from official download page and install it. However, please take note that the 24-hour ban period shall follow even after you uninstall WhatsApp Plus/WhatsAppMD and install official WhatsApp app again.

Monday, January 12, 2015

Top 5 Less Known Features of VLC Media Player

Posted By: Saurabh Deochake - 9:43:00 PM


Now, if you ask anybody which media player would they prefer to play their multimedia files, a majority of answers would be VLC Media Player. VLC is one of the most widely used multimedia player worldwide. It is a portable, cross-platform and (thankfully!) a free open-source software released by VideoLAN. Although VLC is used on millions of devices across the world, there are a few less known and less used features of VLC. Here, in this post we give you top 5 less known features of VLC Media Player. 

1) VLC as a YouTube Video Downloader

We all know that VLC Media Player can be used to stream the videos using Open Network Stream option. Sometimes we want to download YouTube videos but we cannot, of course unless we have a YouTube downloader software installed on the device. Surprisingly, VLC can also be used as a YouTube video downloader eliminating the need to download all those one-click video downloader and browser extensions to download our favorite YouTube videos. 

Follow the steps to download YouTube videos using VLC:
  1. Go to Media -> Open Network Stream and paste the URL of the YouTube video that you intend to download.

  2. Click Play and when VLC starts playing the video, go to Tools ->Codec Information and copy the Location URL and paste the URL in your browser.

  3. Click Play to play the video in browser. Once the video starts playing, right click on the video and Click Save As to download the video.

2) VLC as a File Converter 

Yes! You've read VLC as a file converter! We can use VLC media player as a tool to convert multimedia files from one format to another. Gone are those days when we had to download multimedia file converter software. 

Follow the steps to convert files using VLC:
  1. Go to Media -> Convert / Save.
  2. In Open Media prompt, click on Add to add the files that you need to convert.

  3. Click on Convert / Save. In Convert pop up window, select the file type your original file to be converted from wide range of options in Profile.
  4. Write the location of the destination file and click Start. After the conversion process is finished. You can check your converted file at the "destination location".

3) VLC as an Online Video Chat Recorder

Apart from playing multimedia files, another awesome use of VLC media player is to record your online video chats. 

Follow the steps to record your online video chat sessions using VLC:
  1. Go to Media -> Open Capture Device

  2. On Open Media pop up window, select Webcam option and Microphone option from Video device name and Audio device name drop down boxes, respectively.
  3. Drop down the Play button which opens the Convert pop up window where you can select the Destination file, click on the Browse button to select video file location, name and format.

4) VLC as an Audio Normalizer

When you are playing audio and video files and a sudden increase in the volume jars your ears, it’s a feature to keep in mind. In case of video, you have to restart the video for it to take effect. Go to Preferences -> Audio and select normalization levels from Normalize volume to option.

5) VLC as a Tool to Play Videos in ASCII Art

Another cool feature which is less common feature is playing videos in ASCII art. Yes! You can use VLC player to play videos in ASCII text. To play videos in cool ASCII text, go to Preferences -> Video and select Color ASCII art video output from Output drop down menu.


Now, play any video file and enjoy it watching in cool ASCII text.

Got any more lesser known features of awesome VLC Media Player that are not listed here? Please share them in comments below.

Wednesday, January 7, 2015

Top 5 Free Alternatives to Adobe Photoshop

Posted By: Saurabh Deochake - 9:49:00 PM


Adobe Photoshop has been one of the most widely known picture editing software for some years now. It has become so dominant that we use its name as verb. If you want to get your hands on Photoshop, you will have to spend around $50 for complete package. The best thing about Open Source Software Communities is that many people work hard to build free alternatives to expensive commercial products. In this post, we give you top 5 alternatives to Adobe Photoshop which are absolutely free.

1. GIMP (Win/Linux/OS X)

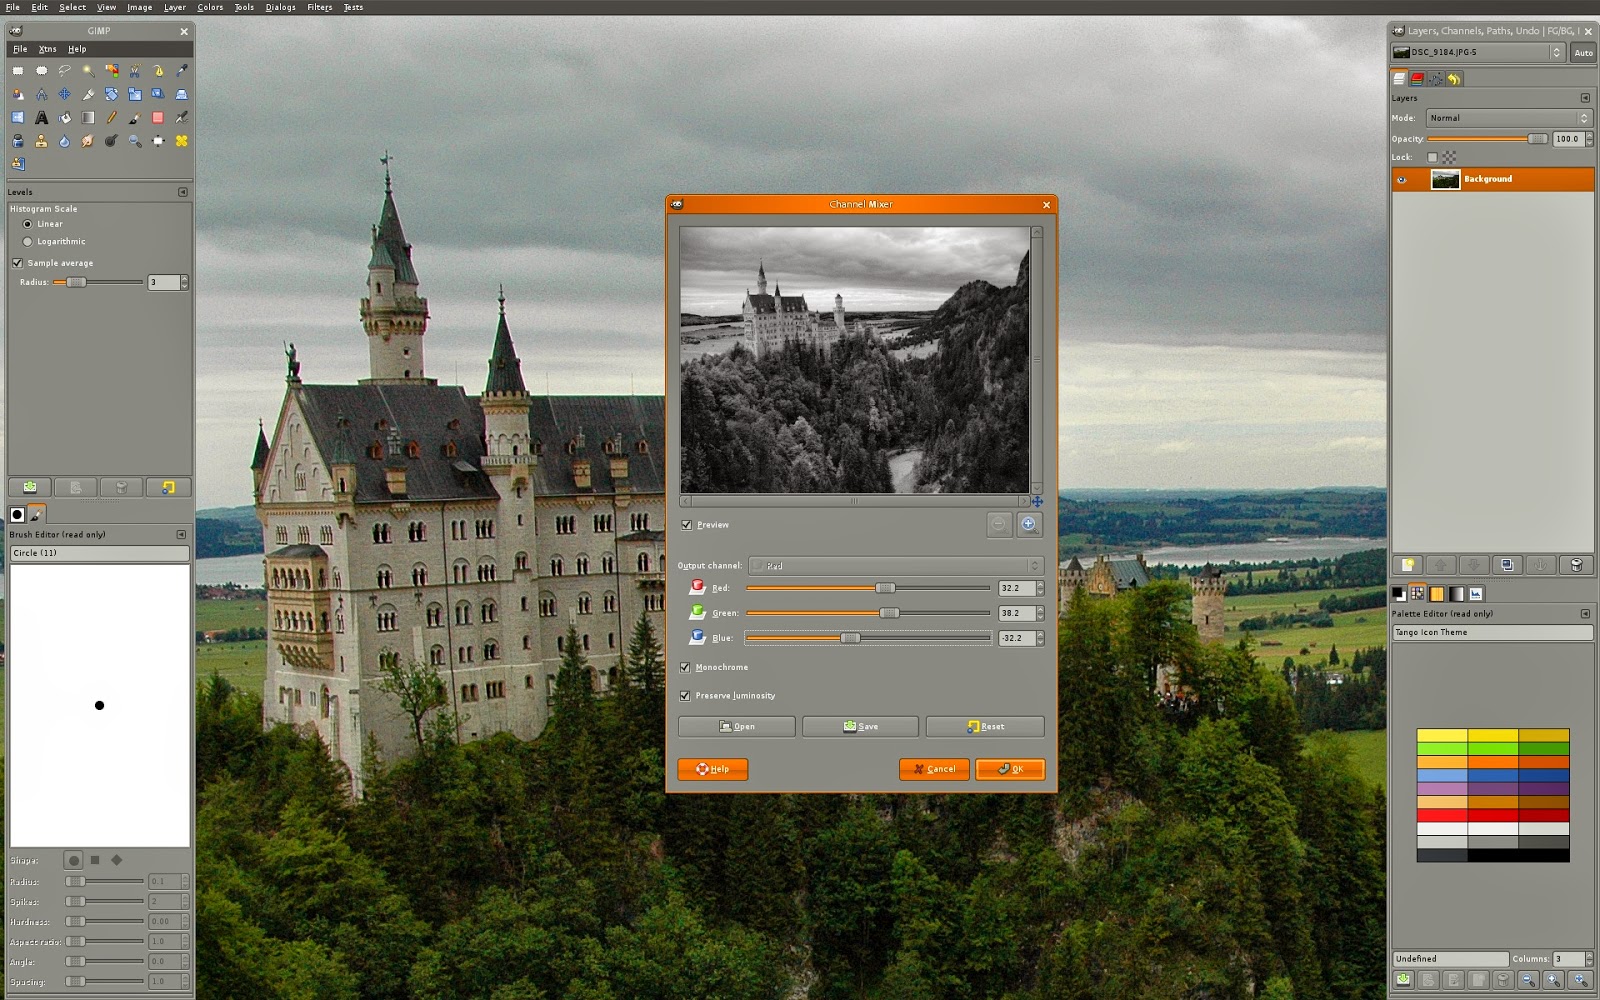
Whenever we hear about an alternative to Photoshop, one program that comes to our mind is GIMP. GIMP (GNU Image Manipulation Program) is a freely distributed image editing software used for tasks such as photo retouching, image composition and image authoring. It can be used as a simple paint program, an expert quality photo retouching program, an online batch processing system, a mass production image renderer, an image format converter, etc. GIMP is designed to be augmented with various plug-ins and extensions to carry out everything from the simplest task to the most complex tasks.
GIMP Linux Distribution
One can be a little bit bewildered with a lot of features and tools that come shipped with GIMP. Fortunately enough, it does not take a long for a newbie to get familiar with GIMP and its features. Additionally, there is a multitude of tutorials of GIMP to make you more familiar with the software.

How to get it?

GIMP is available on both Windows and Linux. One important thing to note is GIMP does not work on all the Windows operating system before Windows XP. You can download GIMP here.

2. Pixlr Express (Web/Android)

Now, Pixlr Express is one of the most impressive photo editing software launched by Autodesk Inc. Pixlr is a web-based online photo editing service which is now made available on the Windows desktop and Mac computers. The software comes with a plethora of cool features like Blur, Liquify, Heal, Smooth and Focal Blur. One can always customize the image with advanced features like adding the border, stickers and text with some impressive font styles. Pixlr Express is not just one of the best online image editors, but one of the best Web-based and Android applicatons.

Pixlr Express Effects Panel

How to get it?

Best thing of Pixlr Express is that it is available on Windows, Mac and Android platforms making it one of the most popular applications in the market of image processing. Check your platform and see where can you get Pixlr Express from:
  • Windows and Mac: Get Pixlr Express from here.
  • Android: Get Pixlr Express app on Google Play Store from here.

3. Paint.Net (Windows)

Another freely distributed image processing software, Paint.Net is widely acclaimed by popular websites like CNET, Lifehacker and PC World. It started as an undergraduate college design project which eventually became one the most popular free picture editing software. Paint.Net features layer support, and a useful list of effects which can be used to accomplish wide range of picture manipulations from simple picture editing to a complex rendering tasks. Paint.Net also supports a wide range of plug-ins created by community to carry out specific advanced tasks.
Paint.Net Editing Tools Screenshot
With a simple menu and tool box, it's certainly one of the most human-friendly Photoshop alternatives available. An advanced user seeking to get his hands on Paint.Net may get disappointed as it doesn't have too many top-end features.

How to get it?

One disadvantage of Paint.Net is that it is made to work only on Windows platform (sorry Mac and Linux users!). To add to that minimum system required to run Paint.Net as per their website must run Windows 7 (Service Pack 1) and above. Another important thing to note is this software does not work on the Windows RT operating system. You can download Paint.Net from here.

4. PicMonkey (Web)

PicMonkey is the best alternative to Picnik Photo Editor which was shut down by Google and quickly merged into Google+ by the name Google+ Photo Editor. After Picnik was shut down by Google, two former Picnik engineers, Brian Terry and Justin Huff founded PicMonkey in April 2012. The online application to edit the pictures is very much simple. All you have to do is upload the image you want to edit, but once you're in you have a pile of different tools to use. Shapes, textures, and text can be added with a couple of clicks, and there are some cool effects to play around with too.
 
PicMonkey Editor Screenshot
Although PicMonkey does not provide tools and features that are provided with Photoshop, but it comes with ample effects and tools to give you Photoshop-esque look to your pictures.

How to get it?

Being a web-based photo editing application, PicMonkey can be used on all operating systems. Another impressive thing about PicMonkey is that it is also available on Google Chrome Store as an extension for Google Chrome browser. Check your platform and see where can you get PicMonkey from:
  • Windows/OS X/Linux- Get PicMonkey from here.
  • Google Chrome Extension- Get PicMonkey extension for Chrome browser from here.

5. Sumo Paint (Web)

Sumo Paint is an online image editor and an impressive web-based alternative to Photoshop. You can edit your photos without need to install anything to your device. It's one of the most versatile photo editor and painting application that works in a browser. You can open and save images from your hard drive or save it to cloud. Sumo Paint supports some advanced features like Layers, Texture, Fractals and so on. 
Sumo Paint Photo Editor Screenshot
Being a web-based photo editing application, Sumo Paint can be used on all operating systems. Like PicMonkey, Sumo Paint is also available on Google Chrome Store as an extension for Google Chrome browser. Check your platform and see where can you get Sumo Paint from:
  • Windows/OS X/Linux- Get Sumo Paint from here.
  • Google Chrome Extension- Get Sumo Paint extension for Chrome browser from here.
Those are our top 5 picks, but definitely there are other applications out there. Got a favorite that we didn't mention? Share it below!

Monday, December 29, 2014

Shift + Number Keys Not Giving Expected Symbols

Posted By: Saurabh Deochake - 3:35:00 PM


The Problem

It can surely be annoying when you are about to send a tweet and started typing the hash tags by using "Shift" and "Number 3" key on the keyboard and you don't see "#" symbol. While it is supposed to make a "#" symbol, all you see is a "." or "&". It may happen that all other combinations of "Shift" and Number Keys are messed up.

But, before you think something is wrong with your keyboard and decide to change it, have a look at the simple solution to the problem below.


The Solution

The problem does not lie in your keyboard but the problem arose while you were typing. It may happen that by mistake and unknowingly you pressed left "Alt" and "Shift" key and you changed the input language of the keyboard. This can happen when your system has more than one input language set. Follow the steps below to solve the problem.
  1. Go to the Control Panel and locate "Clock, Language and Region" options
    Control Panel
  2. Click on "Change keyboards or other input methods" and Click "Keyboards and Languages" tab

    Change Input Languages
  3. Click on "Change keyboards" tab and Select "English" as your default input language.

    Add English as Default Input Language
  4. You may want to remove all other input languages except English. To do this, click on the input language and click "Remove" button to the right. Do this for all unwanted input languages.
And that's it! Your problem is solved! Always remember the shortcut to change the input languages, which is left "Alt" and "Shift" key!

[Solved] LXC: not authorized to change the password

Posted By: Saurabh Deochake - 2:43:00 PM


The Problem

This problem occurs especially when LXC Containers are run on a host machine with CentOS distribution. When we want to create an user inside the container, we get an error which says "..... is not authorized to change the password of <user_name>. A snippet of the error is shown below:
~]# passwd testuser

passwd: unconfined_u:unconfined_r:unconfined_t:s0-s0:c0.c1023 is not authorized to change the password of testuser

Containers Abstract Image

The Solution 

The culprit behind this problem usually is SELinux. When set to "Enforcing" or "Permissive", the SELinux would deny the user to change user parameters inside the containers like passwords as we encountered in the problem. Though, it is not safe to disable SELinux; we can solve above problem temporarily by checking the status of SELinux and disabling it. To get the "passwd" command work inside the container, follow the steps below:

1. Check SELinux settings on CentOS Host Machine
~]$ sestatus
SELinux status:                 enabled
SELinuxfs mount:                /selinux
Current mode:                   enforcing
Mode from config file:          enforcing
Policy version:                 24
Policy from config file:        targeted
2. Check SELinux settings on Guest
~]$ sestatus
SELinux status:                 enabled
SELinuxfs mount:                /selinux
Current mode:                   enforcing
3. Disable SELinux from Config file
  1. Go to the config file located at /etc/selinux/config 
  2. Change SELINUX option to disabled 
  3. Save and close the file
4. Reboot the Host Machine
5. After reboot, check SELinux setting parameter using getenforce
~]$ getenforce
Disabled
Now, check again if the problem still persists in the guest virtual machine. This temporary fix should solve the problem.
    *Note: This is only a temporary fix to the problem. If you want to have more insight on the problem and patches to fix the internal problems in LXC (if any), please post your queries to "lxc-users" mailing list here.

    Saturday, December 27, 2014

    Upgrade Sony Xperia S to Android 5.0 Lollipop: A Step-by-Step Guide

    Posted By: Saurabh Deochake - 12:17:00 PM


    Every phone has a finite life when it comes to firmware updates. Sony Xperia S, Sony's once flagship Android smartphone was launched in February 2012 with Android 2.3 Gingerbread and offered an upgrade to Android 4.1 Jellybean. In February 2014, Sony confirmed that a number of its smartphones will "not receive any further software upgrade support". The phones which are no longer supported for software upgrade are between 18 months and two years old which also included Xperia S and its twin smartphone Xperia SL. Many Xperia S users would want to keep their smartphone up-to-date with the latest OS and firmware by rooting their devices. In this post, we will discuss step-by-step process to upgrade your Xperia S to the latest Android 5.0 Lollipop with the help of custom ROM firmware.

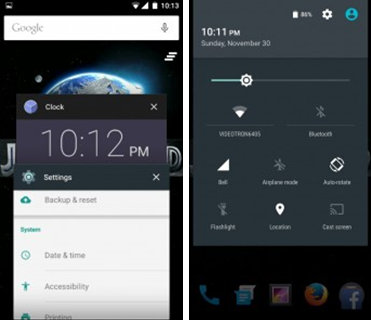
    Android 5.0 Lollipop Sample Screens

    Key Features of Android 5.0 Lollipop

    • 4x performance improvements
    • Faster and more powerful computing
    • Supported on ARM, x86 and MIPS architectures
    • Full 64-bit compatibility
    • Improved A/V Sync
    • More intelligent notification system
    • Support for OpenGL ES 3.1 with Android Extension Pack (AEP)
    • New types of Sensors: Tilt Sensors and Heart Rate Sensors
    • Improved battery saver feature for better and efficient power management
    Before we start with our procedure to update the system to Android 5.0 Lollipop, please go through some important pre-requisites given below:

    Pre-requisites 

    • Backup all the data in your Xperia S including SMS, Call Log, Contacts, All multimedia files and other important local files. Failure to backup it would result in loss of important data in your cellphone.
    • Make sure your smartphone battery is charged up to at least 80%
    • Enable USB Debugging Mode from Settings option.
    • Make sure that your smartphone is rooted.

    Updating Xperia S to Android 5.0 Lollipop

    1. Install ROM Manager App on your Xperia S. You can get this app from Google Play Store here.
    2. Install clockwork mod recovery.
    3. Download the Android 5.0 ROM from the link below:
      1. Part 1: http://goo.gl/7pyL97
      2. Part 2: http://goo.gl/ffHU2x
      3. Part 3: http://goo.gl/l1zKh5
    4. Combine 3 parts of custom ROM into 1 file using WINRAR.
    5. Connect your Xperia S to PC via original USB Cable. Copy downloaded consolidated ROM file to SD card.
    6. Using ROM Manager, restart your cellphone in the recovery mode. Once your cellphone gets into Recovery Mode, select Backup/Restore option in the ROM Manager to backup your information.
    7. Perform a total data erase, including Delvik Cache from the Recovery Menu. Once completed, in the Recovery Menu, click on Flash ROM from SD Card. 
    8. Navigate to the location of downloaded ROM file and follow the instructions to install Android 5.0 Lollipop on your smartphone.
    9. Once the installation is completed, reboot your Xperia S. 
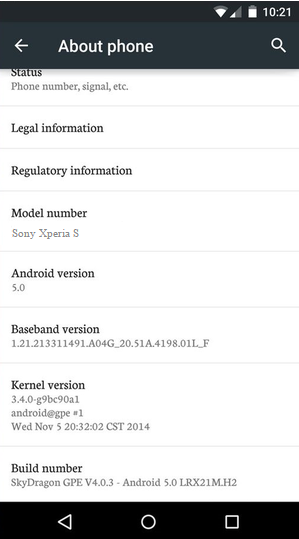
    Updated System Information

    Congratulations! You've just upgraded your Xperia S to Android 5.0 Lollipop.

    Note: If your smartphone gets stuck while booting during the installation, perform the wipe cache partition and dalvik cache before rebooting the smartphone.


    Friday, December 26, 2014

    Libvirt: In a Nutshell

    Posted By: Saurabh Deochake - 9:40:00 PM


    In one of the previous posts, we discussed about lightweight virtualization solutions and more specifically, Linux Containers aka. LXC. Although, LXC has its own management tools that are shipped with the package, there are other APIs and virtual machine managers which can be used to manage various hypervisors and container systems. In this post, we discuss about Libvirt, a widely popular open source virtual machine management API.

    What is Libvirt?

    Libvrit is an open source API, daemon and virtual machine manager for managing platform virtualization. Libvirt can be used to manage various virtualization solutions like LXC, KVM, OpenVZ, Xen and VMware ESX. Libvirt is a C Library, but it offers bindings in other languages some of which are Python,Perl, Ruby and Java.  

    Some of Hypervisors Supported by Libvirt

    Supported Hypervisors

    Libvirt Supports a multitude of hypervisors and virtualization solutions. Some of widely known hypervisors supported by Libvirt are:
    1. LXC- Linux Containers
    2. OpenVZ
    3. QEMU/KVM
    4. Xen Hypervisor
    5. VirtualBox
    6. VMware ESX and GSX Hypervisors
    7. Microsoft's Hyper-V Hypervisor
    8. IBM's PowerVM for AIX

    Command Line Tools

    Libvirt comes with a plethora of tools for management purposes. These tools range from virtual machine management to file system management, from memory management to provision of virtual machines over the network. Some of important command line tools that are used are:
    • virsh: An interactive shell and a virtual machine management tool which comes shipped with core distribution of Libvirt. It is one of the most important tool when it comes to managing various tasks on domains like virtual machines, containers or storage managed by Libvirt. 
    • virsh-top: Another interactive command line utility to keep track of CPU, memory, disk and network utilization of all the virtual machines running on a host machine. This utility is essentially similar to "top" command which provides an ongoing look at processor activity of host machine.
    • virt-what: A shell script essentially used for detecting if the program is running on the virtual machine.
    • virt-df: Another commond line utility which is similar in working with that of Linux file system command, "df". This utility offers the file system information of all virtual machine running on the host machine. This utility gives the information about how much disk space is used in each of guest disk.
    • virt-clone: This tool allows disk image(s) and configurations to be cloned from one virtual machine to another. This tool comes in handy especially while creating a new virtual machine from existing virtual machine keeping disk configurations intact. It automates copying of data across to new disk images, and updates the UUID, MAC address, and name in the configuration.

    Get Libvirt

    Libvirt is an open source software and released under the GNU Lesser General Public License (see the file COPYING.LIB in the distribution package for the precise wording). You can get Libvirt from the latest upstream tarballs from hereYou can also get it using git clone from git clone git://libvirt.org/libvirt.git.

    Creative Commons License
    This blog by Linuxys is licensed under a Creative Commons Attribution-NonCommercial-ShareAlike 4.0 International License.

    Copyright © 2015 Linuxys™ All rights reserved.

    Designed by Templateism. Hosted on Blogger Platform.