Every phone has a finite life when it comes to firmware updates. Sony Xperia S, Sony's once flagship Android smartphone was launched in February 2012 with Android 2.3 Gingerbread and offered an upgrade to Android 4.1 Jellybean. In February 2014, Sony confirmed that a number of its smartphones will "not receive any further software upgrade support". The phones which are no longer supported for software upgrade are between 18 months and two years old which also included Xperia S and its twin smartphone Xperia SL. Many Xperia S users would want to keep their smartphone up-to-date with the latest OS and firmware by rooting their devices. In this post, we will discuss step-by-step process to upgrade your Xperia S to the latest Android 5.0 Lollipop with the help of custom ROM firmware.
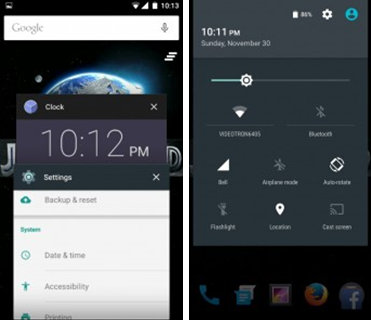 |
| Android 5.0 Lollipop Sample Screens |
Key Features of Android 5.0 Lollipop
- 4x performance improvements
- Faster and more powerful computing
- Supported on ARM, x86 and MIPS architectures
- Full 64-bit compatibility
- Improved A/V Sync
- More intelligent notification system
- Support for OpenGL ES 3.1 with Android Extension Pack (AEP)
- New types of Sensors: Tilt Sensors and Heart Rate Sensors
- Improved battery saver feature for better and efficient power management
Before we start with our procedure to update the system to Android 5.0 Lollipop, please go through some important pre-requisites given below:
Pre-requisites
- Backup all the data in your Xperia S including SMS, Call Log, Contacts, All multimedia files and other important local files. Failure to backup it would result in loss of important data in your cellphone.
- Make sure your smartphone battery is charged up to at least 80%
- Enable USB Debugging Mode from Settings option.
- Make sure that your smartphone is rooted.
Updating Xperia S to Android 5.0 Lollipop
- Install ROM Manager App on your Xperia S. You can get this app from Google Play Store here.
- Install clockwork mod recovery.
- Download the Android 5.0 ROM from the link below:
- Part 1: http://goo.gl/7pyL97
- Part 2: http://goo.gl/ffHU2x
- Part 3: http://goo.gl/l1zKh5
- Combine 3 parts of custom ROM into 1 file using WINRAR.
- Connect your Xperia S to PC via original USB Cable. Copy downloaded consolidated ROM file to SD card.
- Using ROM Manager, restart your cellphone in the recovery mode. Once your cellphone gets into Recovery Mode, select Backup/Restore option in the ROM Manager to backup your information.
- Perform a total data erase, including Delvik Cache from the Recovery Menu. Once completed, in the Recovery Menu, click on Flash ROM from SD Card.
- Navigate to the location of downloaded ROM file and follow the instructions to install Android 5.0 Lollipop on your smartphone.
- Once the installation is completed, reboot your Xperia S.
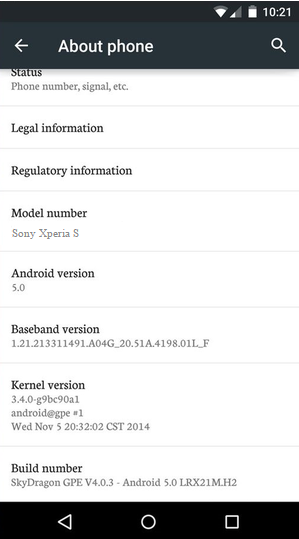 |
| Updated System Information |
Note: If your smartphone gets stuck while booting during the installation, perform the wipe cache partition and dalvik cache before rebooting the smartphone.
 Hot Topics
 Tags
Tags Videos


0 comments:
Post a Comment